|
|
| GIS Cookbook: Cartographic Design - Adding a Neatline or a border to your map layout. |
Keywords: Presentation, border, frame, neatline, printing
Category: Cartographic Design
Software: ArcInfo 8
Problem: How do I add a border to my map?
Description: Your map is in the layout window, now you would like to add a border or borders around or within the map.
Methodology:
1) In your layout window, select the object or objects you would like a border around. If you would like to place a border around the entire presentation area (i.e. a neatline), make sure that nothing in your layout has been is selected/highlighted.
Note: Adding a neatline is usually the last step before printing.
 |
Neatline Manager Window
|
2) In the layout window, select Insert -> Neatline .
 |
Your newly added neatline and background color
|
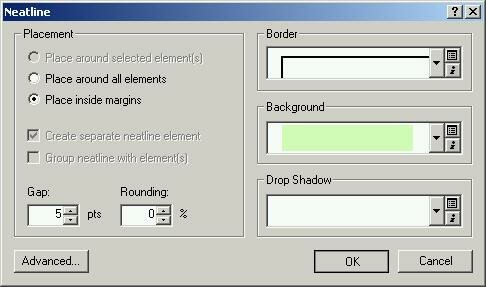
3) The Neatline window will come up
 |
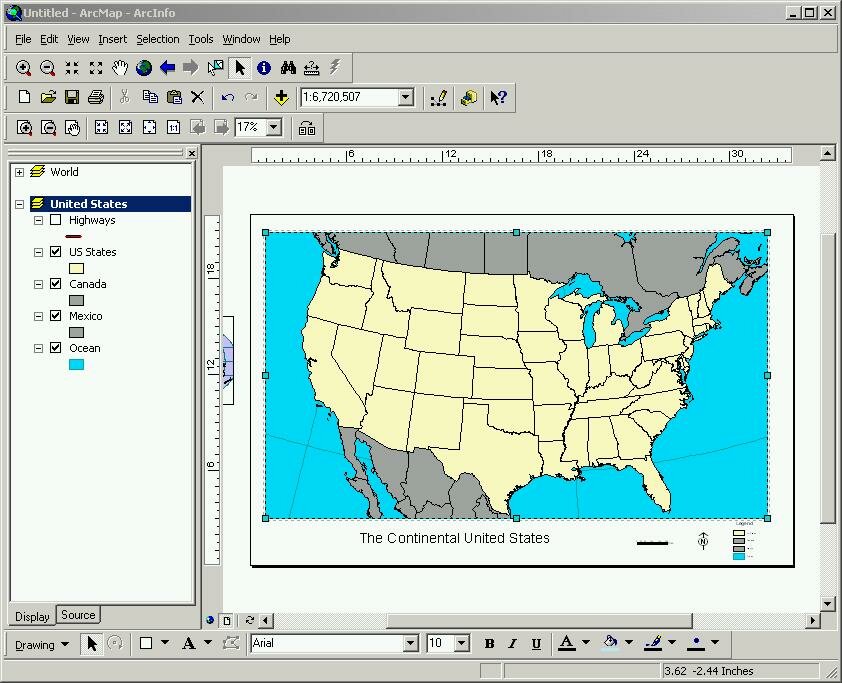
The layout to which you would like to add a neatline
|
4) Select the appropriate styles and details for your border. If you would like a default selection, use the Inset from Margins selection if you want a border/Neatline around your whole presentation.
5) You can also choose a background color and a drop shadow.
6) When you are finished selecting the different options, click Ok and your border should appear. Like all steps in preparing a presentation, finding the correct settings for your border requires trial and error.

7) You can further change the border/neatline by double clicking on it and following the menu options.
|
| Authored by: Benjamin N. Sprague Modified: 8/27/03 |
|
Copyright © 2002-2015 by Regents of University of California, Santa Barbara
Cookbook: Ben Sprague, Ethan Sundilson, Carlin Wong, Sam Ying
|
|
|